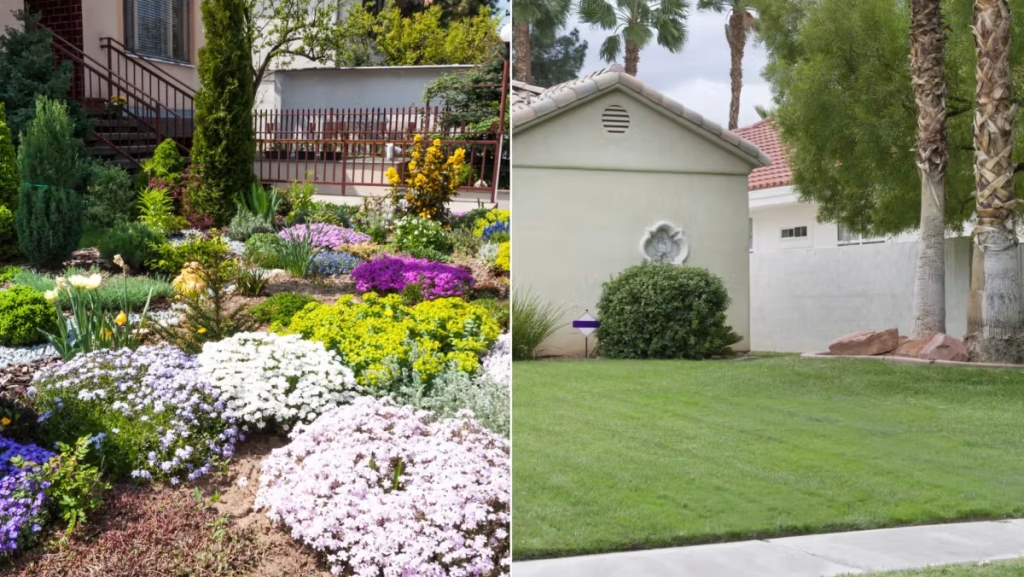
Are you tired of spending your weekends mowing, watering, and maintaining a lawn instead of enjoying quality time with your family?
What if we told you you don’t have to anymore? You can simply replace your lawn with beautiful native plants that are even better suited to the climate of Eastern Washington.
And here’s the good news. A lawn-to-native-plant conversion can turn your ordinary stretch of turf into a landscape with native grasses, wildflowers, shrubs, and other plants adapted to local conditions. It can even reduce mowing and, once plants are established, reduce the amount of supplemental water some areas need.
However, a successful conversion takes some planning. You need to decide what will replace the lawn, choose the right way to remove the turf, prepare the site, select plants that fit the conditions, and give those plants time to establish.
Why Bother Converting Your Lawn in the First Place?
Let’s be honest—if your lawn is working well for you, there’s no reason to tear it all out just for the sake of having native plants.
Here are a few reasons homeowners consider making the switch:
- Less mowing: Replace regularly mowed turf with native grasses, wildflowers, and shrubs.
- Lower water use: Many native plants are adapted to Eastern Washington’s climate and can need less supplemental water once established.
- Less maintenance: A well-planned native landscape can reduce routine mowing and other turf-related work.
- More habitat: Native plants can provide food and shelter for pollinators, birds, and other wildlife.
- More variety: Instead of one type of grass covering the yard, you can introduce flowers, grasses, shrubs, and different textures.
- Better use of difficult areas: Slopes, narrow strips, and spaces that are rarely used can often be better suited to native plantings.
Lawn to Native Plant Conversion Steps
If you are looking for some beneficial lawn replacement ideas, here’s how to do it step by step.
Step 1: Decide How Much Lawn You Want to Replace
You don’t have to remove your entire lawn.
In fact, keeping some turf can make sense if you use it for children, pets, outdoor activities, or entertaining. Start by identifying the areas that provide the least value but require the most mowing or watering.
Good candidates may include:
- Narrow strips that are difficult to mow
- Slopes that are hard to irrigate
- Areas that receive intense afternoon sun
- Unused sections of the front yard
- Areas where grass consistently struggles
- Spaces where you want a garden, habitat area
Step 2: Study Your Yard Before You Remove the Turf
Before starting the turf removal process, spend some time looking at the conditions in the areas you’re converting.
Take note of:
-
Sunlight:
Full sun, partial shade, or shade?
-
Soil:
Sandy, clay-heavy, rocky, or compacted?
-
Drainage:
Does water drain quickly or collect after irrigation?
-
Slope:
Is the area flat or sloped?
-
Existing plants:
Are there trees or shrubs worth keeping?
-
Irrigation:
How is the area currently watered?
-
Wind:
Is the planting area particularly exposed?
These details will influence everything that comes next, especially your plant selection.
Step 3: Decide What Will Replace the Grass
Now you can start thinking about your lawn replacement ideas.
A native plant landscape doesn’t have to look like an untouched piece of wild land. You can design it just as intentionally as a traditional garden.
Consider combining:
- Native flowering plants
- Native bunchgrasses
- Native shrubs
- Groundcovers
- Mulched planting beds
- Gravel or other appropriate hardscape
- Pathways and stepping stones
- Small areas of remaining lawn
Think about height, color, texture, bloom time, and how the plants will look together as they mature.
Step 4: Choose Your Turf Removal Method
Now for the physical part.
If you’re wondering how to remove grass for xeriscaping, you have several options. The best method depends on the size of the area, how quickly you want the project finished, and how much labor you’re willing to do.
Remove the Sod by Hand
For small areas, you can cut the grass and roots with a shovel or sod-cutting tool and lift the sections out.
Best for:
- Small planting beds
- Narrow strips
- Smaller DIY projects
Pros:
- Immediate results
- No need to wait for grass to decompose
- Gives you direct access to the soil
Cons:
- Physically demanding
- Time-consuming
- Removes some topsoil with the turf
For larger areas, renting a sod cutter can make the job considerably faster.
The machine cuts beneath the grass so the turf can be rolled or removed in section.
Step 5: Prepare the Soil
Removing the grass doesn’t mean you’re ready to plant immediately.
Once the turf is gone, inspect the soil.
Look for:
- Compacted areas
- Poor drainage
- Existing weeds
- Exposed roots
- Erosion
- Very shallow soil
- Areas with construction debris or excess gravel
If the soil is heavily compacted, carefully loosening it can help new plants establish.
Prepare the soil for the plants you intend to grow—not for the lawn you just removed.
If drainage or grading is a major problem, solve that before planting.
Step 6: Plan Your Irrigation
A native plant landscape usually won’t use water in the same way a lawn does.
Traditional turf is generally watered across a large, uniform area. A native landscape may contain plants with very different water requirements.
This is where hydrozoning can help.
Group plants with similar water needs together so you aren’t watering the entire landscape just to keep one group of plants happy.
You may need to:
- Remove unnecessary sprinkler heads
- Create separate irrigation zones
- Convert some areas to drip irrigation
- Adjust sprinkler coverage
- Reduce watering as plants become established
Keep in mind that drought-tolerant plants still need water while they’re establishing their root systems.
Step 7: Choose Native Plants for Eastern Washington
This is the part that gives your project its native-landscape identity.
Don’t choose plants simply because they’re labeled “drought tolerant.” Start with the conditions in your yard and select species that can thrive there.
Some Eastern Washington possibilities include:
Native Grasses
Bluebunch wheatgrass
A characteristic Eastern Washington bunchgrass that provides structure and movement in sunny, dry landscapes.
Idaho fescue
A fine-textured bunchgrass that can work well where conditions are somewhat less dry or where partial shade is available.
Sandberg’s bluegrass
A smaller native bunchgrass that can be useful in dry, open areas.
Native Flowers
Arrowleaf balsamroot
A striking native perennial with yellow flowers that can bring strong seasonal color to a dry landscape.
Penstemons
Native penstemons offer attractive flowers and can provide valuable nectar resources for pollinators.
Buckwheats
Several native buckwheat species are well suited to dry conditions and can add both flowers and low-growing texture.
Yarrow
A familiar native perennial that can work in a variety of landscape settings.
Native Shrubs
Rabbitbrush
A tough native shrub known for its yellow flowers and ability to handle dry conditions.
Sagebrush
An iconic Eastern Washington plant that can provide structure and a strong sense of place.
Golden currant
A useful native shrub that can add flowers, fruit, and seasonal interest.
Serviceberry
A larger shrub that can provide height, flowers, and fruit where site conditions are appropriate.
The important thing is not to plant every species on this list.
Choose plants according to sun, soil, drainage, mature size, and water requirements.
Step 8: Arrange Plants Before You Plant
Before digging holes, place the plants in their approximate locations while they’re still in their containers.
Step back.
Look at the arrangement from the street, from your windows, and from the areas where you’ll spend time in the yard.
Then adjust.
Keep taller plants toward the back or where they won’t block important views. Repeat certain plants throughout the landscape rather than putting every species in its own isolated cluster.
Also pay attention to mature size.
Step 9: Plant Your Native Plants
Once you’re happy with the arrangement, it’s time to plant.
A few basic practices can make establishment easier:
- Dig a hole appropriate for the plant’s root system.
- Avoid planting too deeply.
- Backfill with the appropriate soil.
- Water thoroughly after planting.
- Follow recommended spacing.
- Give each plant enough room to mature.
- Avoid packing plants too closely together.
Don’t worry if the landscape looks a little sparse at first.
Step 10: Add the Right Mulch
Mulch can play an important role in a new native planting.
A suitable mulch layer can:
- Help conserve soil moisture
- Reduce weed competition
- Moderate soil temperature
- Protect exposed soil
- Give planting beds a finished appearance
Keep mulch away from the direct base of plant stems and trunks.
DIY Xeriscape Conversion: Should You Do It Yourself?
A DIY xeriscape conversion can be a rewarding project, especially when you’re working with a relatively small area.
DIY makes the most sense when:
- The area is manageable.
- The soil doesn’t have major problems.
- Drainage is already adequate.
- You can handle the physical work.
- You have time for establishment and maintenance.
- You’re comfortable developing a basic planting plan.
Professional help for xeriscape landscaping becomes more useful when you’re dealing with a large lawn, complicated irrigation, significant grading, poor drainage, invasive weeds, or a landscape that requires careful plant selection and design.
Common Mistakes to Avoid
A few mistakes can make a lawn conversion much harder than it needs to be.
- Removing the lawn before planning the replacement
- Choosing plants only because they look attractive
- Assuming every native plant needs almost no water
- Ignoring soil drainage
- Over-amending the soil
- Planting without considering mature size
- Leaving invasive weeds behind
- Using the existing lawn irrigation without adjustments
- Planting too densely
- Expecting the finished landscape to look mature immediately
The biggest mistake is treating lawn conversion as a single weekend project.
The physical turf removal might happen quickly. Creating a healthy native landscape is a longer process.
Can You Convert Your Lawn a Little at a Time?
Absolutely.
You don’t need to transform the entire property in one project.
Starting small can actually be a smart approach.
You could begin with:
- A front-yard planting bed
- A side-yard strip
- A difficult-to-mow slope
- A hot, dry section of the property
- An area that consumes a lot of irrigation water
Once you see how your plants perform, you can decide whether you want to convert additional areas.
Conclusion
Replacing a lawn with a native plant landscape is not just about getting rid of grass. It’s about creating a new landscape that fits the site and makes better use of the region’s natural conditions.
Start with a plan. Remove the turf carefully. Prepare the soil without overdoing it. Choose native plants that match your site. Then give those plants the water and care they need while they establish.
If the project feels like more work than you expected, that’s where Native Plant Landscaping & Restoration can help. We can take care of the planning, native plant selection, landscape design, turf conversion, installation, and other details needed to create a practical, attractive landscape suited to Eastern Washington.